You finish a hard leg day, your quads feel like concrete blocks, and tomorrow you have to do it again. You have heard that a TENS unit can help, maybe even bought one already, but the instruction manual reads like a technical document for a device you will never fully understand. So the pads sit in a drawer. The soreness lingers. That is the exact problem I want to solve in this guide.
A TENS unit, short for transcutaneous electrical nerve stimulation, sends low-voltage electrical pulses through your skin to interrupt pain signals and encourage your muscles to relax. When used correctly after a workout, it can reduce delayed onset muscle soreness, ease tightness, and help you feel more human 24 hours later. The key phrase there is 'when used correctly.' Most people either place the pads in the wrong spot, crank the intensity too high too fast, or run a session at the wrong time. This guide fixes all three. I will walk you through every step using the TENS 7000, which is the unit I recommend for most everyday gym-goers because it covers every major setting you need without overcomplicating things. If you want to see a full breakdown of how it performs, check out my detailed write-up over at the TENS 7000 long-term review. But for now, let us get into the protocol.
Your next workout starts with how you recover from this one.
The TENS 7000 has over 100,000 Amazon ratings and covers every muscle group you will use in a real training program. It ships with pads, leads, a carrying case, and a manual. Everything you need is in the box.
Amazon Check Today's Price on Amazon →Step 1: Wait at Least 30 Minutes After Your Workout Before Starting
This is the step most people skip, and it matters. Your muscles need a short window to cool down after training before you introduce electrical stimulation. Starting a TENS session while your core temperature is still elevated or while your heart rate is coming down can feel uncomfortable and may cause mild cramping in already-fatigued muscle tissue. Give yourself 30 minutes minimum. An hour is better. Drink water, eat something, get out of your sweaty clothes. Then set up your unit.
The other reason to wait: TENS works best on muscles that have settled. The pain signals you are trying to interrupt are more clearly defined once the acute workout pump has faded. You will feel the stimulation more cleanly and be able to dial in your intensity more precisely. If you train in the morning, a TENS session after lunch is a good window. If you train at night, running a 20-minute session while you wind down before bed works well for most people. Note: if you have any underlying cardiovascular conditions, are pregnant, or have a pacemaker, please consult with your physician before using electrical stimulation of any kind. TENS is widely considered safe for healthy adults, but it is not right for everyone.
Step 2: Identify the Muscle Groups That Are Actually Sore
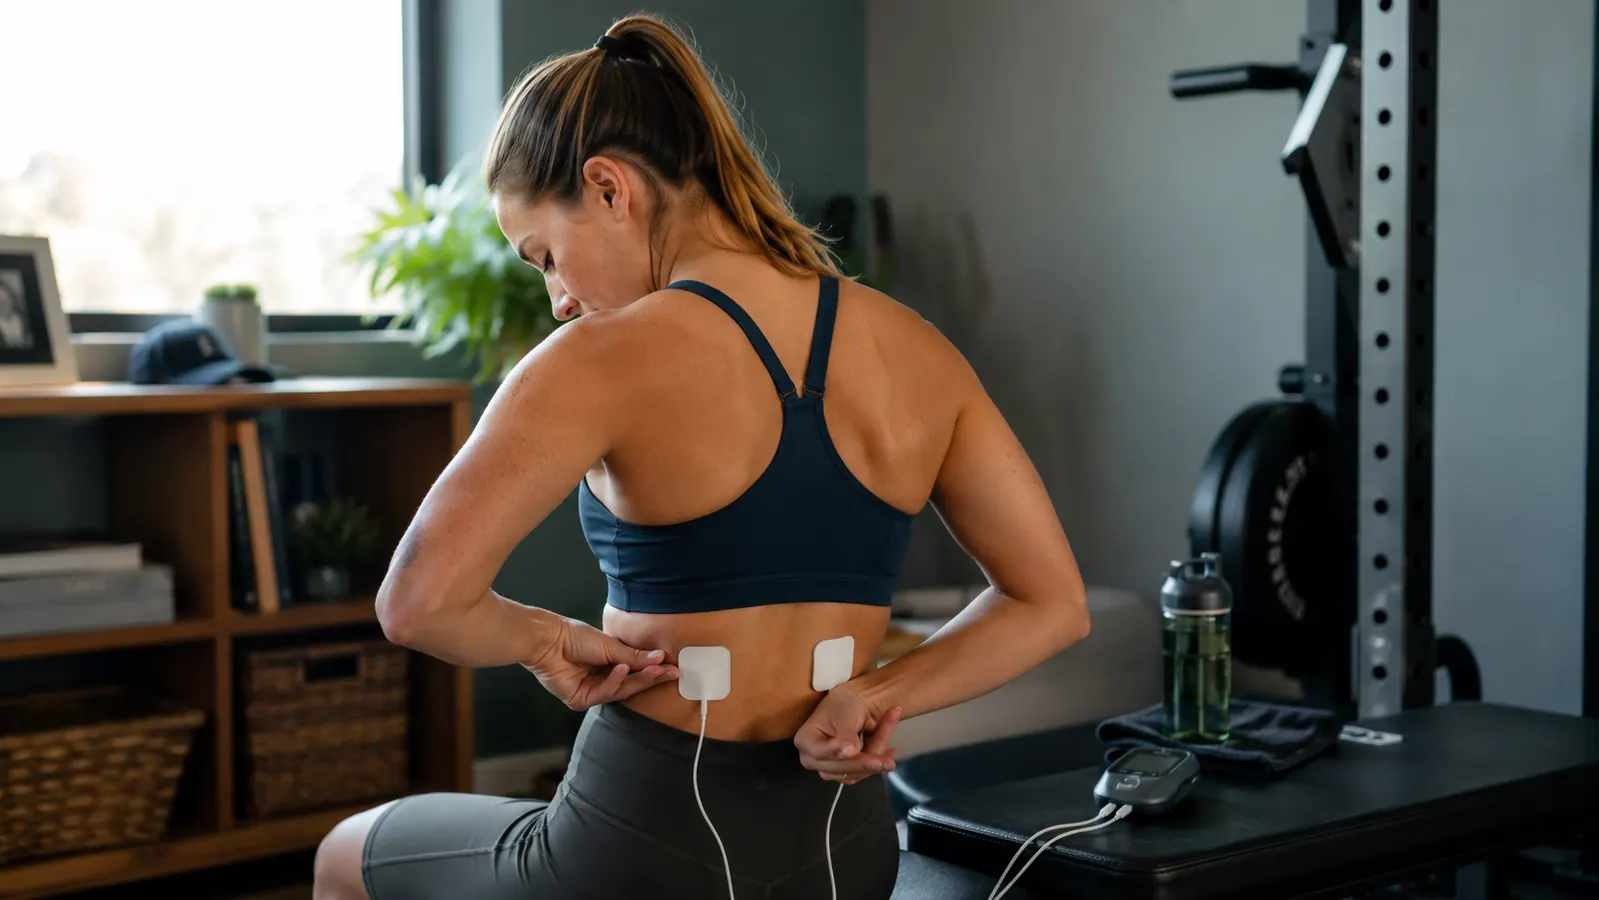
Do not just slap the pads anywhere that feels vaguely tight. The pads need to bracket the sore muscle, not sit on top of a joint, bony area, or the spine itself. Before you get out the unit, do a quick body scan. Ran yesterday? Your calves and hamstrings are probably the priority. Heavy upper-body pull day? Your lats, mid-traps, and rear delts are the targets. Leg day with barbell squats? Focus on your quads and lower back, in that order. Write it down or just keep the list in your head. You are limited to two channels on most basic units, which means you can treat four pads at once across two distinct areas.
On the TENS 7000, you get two independent channels, labeled CH1 and CH2. Each channel controls a pair of electrode pads. That means you can run your quads and your lower back at the same time with separate intensity settings for each, which is genuinely useful because your quads may need more intensity than your lower back, or vice versa. For a full list of the muscle groups that respond best to this kind of treatment, the article on 10 ways a TENS unit speeds up muscle recovery covers the research behind why each area benefits.
Step 3: Place the Electrode Pads Correctly
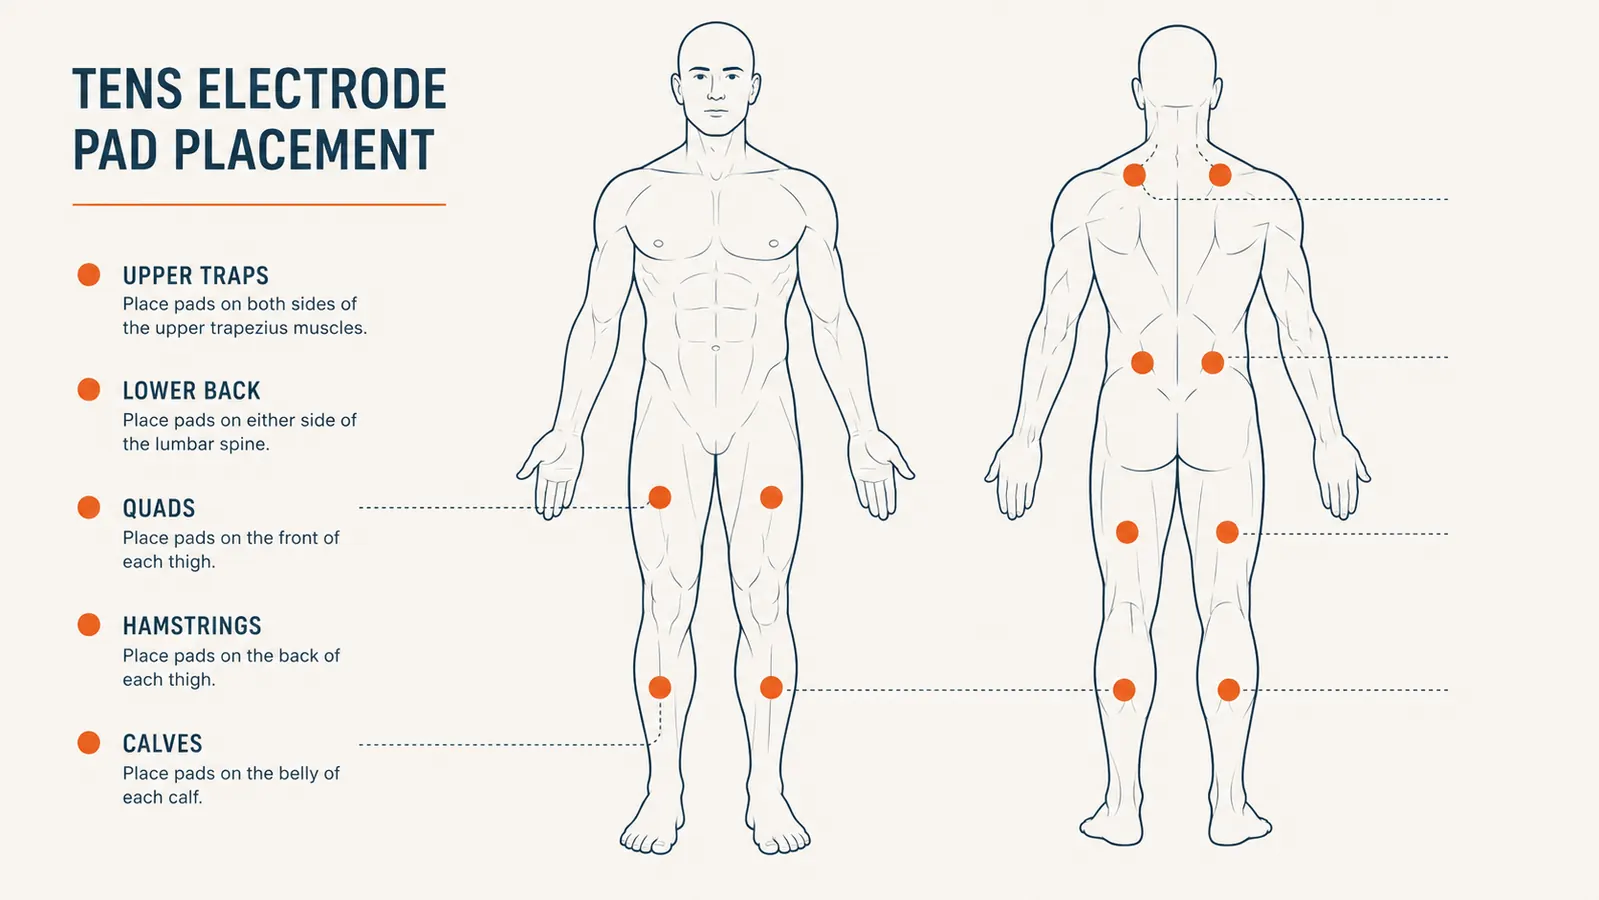
This is where most people get it wrong. The rule is simple: pads go on either end of the muscle belly, not on joints, not directly over the spine, and never on the front of the neck, over the heart, or on broken or irritated skin. For each muscle group, here is where to place them.
For quads: one pad on the upper portion of the muscle near the hip, one pad just above the kneecap. For hamstrings: one pad at the top of the back of the thigh near the glute fold, one pad at the back of the knee. For calves: one pad on the upper calf belly, one pad just above the Achilles attachment. For lower back: place both pads a couple of inches on either side of the spine at the level of your soreness, never directly on the vertebrae. For upper traps and neck: one pad on the upper trap at the shoulder, one pad midway up the trap toward the neck, keeping clear of the neck itself. The goal in every case is to let the electrical current flow through the target muscle. If the pads are too close together, you feel a surface buzz and nothing deeper. If they are too far apart, the signal disperses before it reaches the tissue you care about. Three to six inches apart is a reasonable starting range for most muscle groups.
Make sure the skin is clean and dry before you apply the pads. Lotion, sweat residue, and body oil reduce pad adhesion and weaken the signal. If your skin is particularly oily, a quick wipe with a dry cloth is enough. Do not use alcohol wipes on the skin before every session as repeated use will dry the skin out and reduce pad stickiness over time.

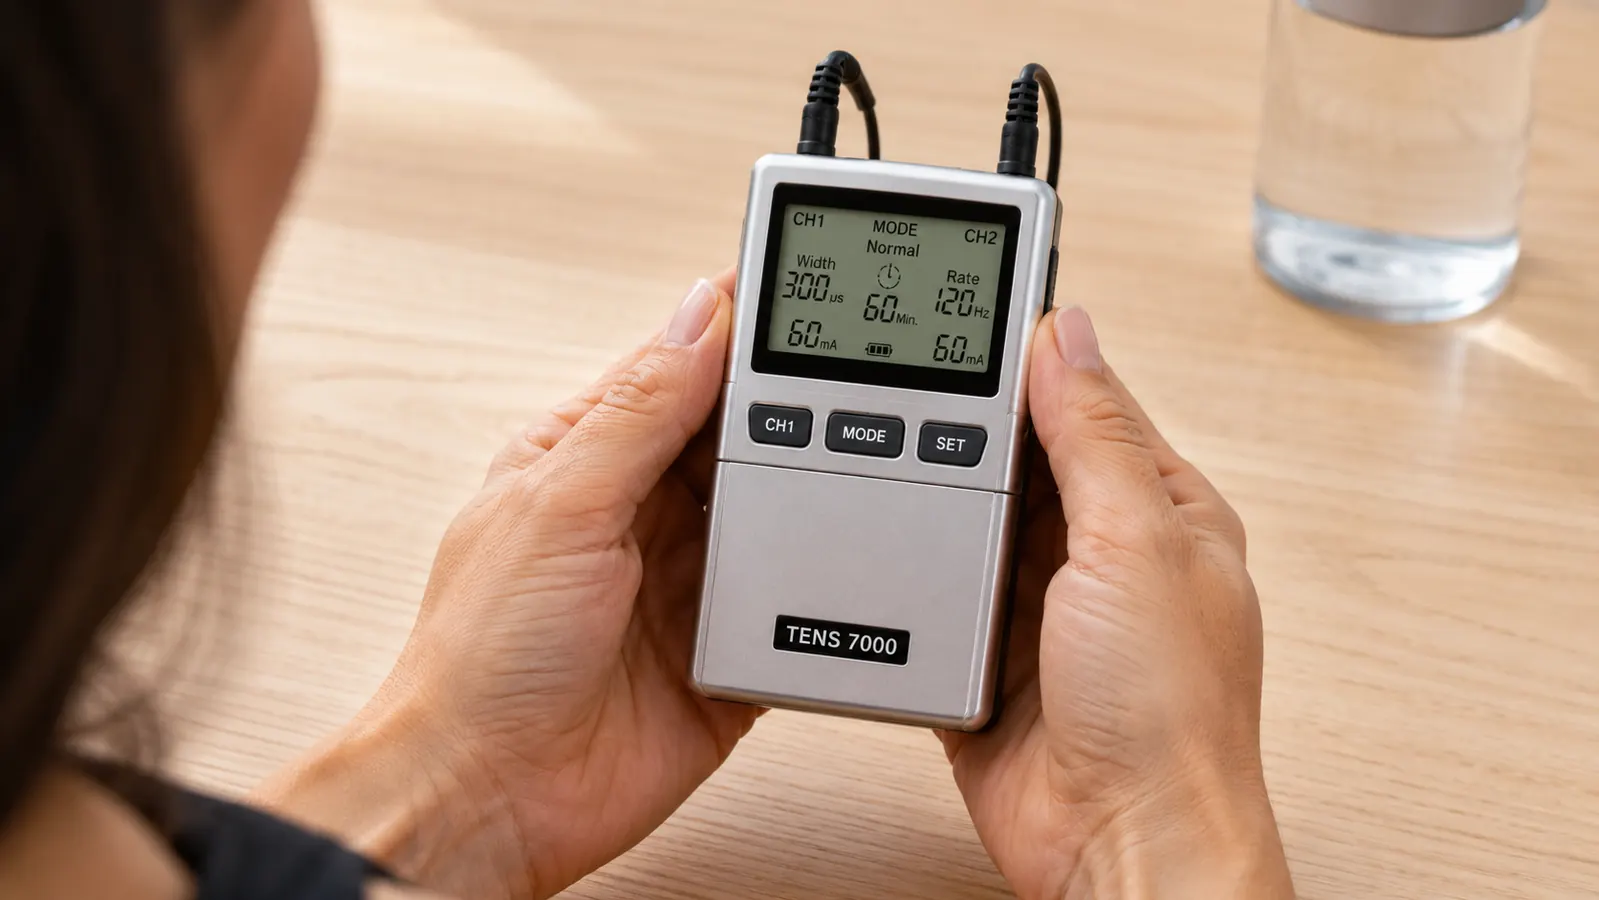
Step 4: Select the Right Mode and Start Intensity Low
The TENS 7000 has multiple mode settings. For post-workout soreness, you want to start with a mode that produces a steady, rhythmic pulse rather than a random or burst pattern. On this unit, Mode 1 or Mode 3 is where most people find the sweet spot for recovery use. Both produce a consistent pulsing sensation that interrupts the pain signals in the target area without causing involuntary muscle contractions that would fatigue an already tired muscle further.
Start the intensity at the lowest setting and turn it up slowly. You are looking for a sensation that feels like a gentle, rhythmic tapping or tingling. It should not be painful. It should not cause a visible muscle twitch or jump. If your muscle is firing involuntarily, the intensity is too high for a recovery session. Back it down one or two notches. A good recovery setting feels noticeable but comfortable. You should be able to breathe normally and hold a conversation without wincing. Most people land somewhere in the lower third of the intensity range for post-workout use. That is normal and expected.
A good recovery TENS session should feel like a gentle, rhythmic tap. If you are wincing, back the intensity down. Pain is not the signal you are after here.
Step 5: Run Each Area for 15 to 20 Minutes
For post-workout soreness, 15 to 20 minutes per area is the right window. Shorter sessions do not give the body enough time to generate a meaningful pain-relief response. Longer sessions, particularly anything past 30 minutes, can over-stimulate the tissue and leave you feeling more sensitive rather than less. Set a timer. Most TENS units, including the TENS 7000, have a built-in timer that cuts off automatically after a set duration, which is a feature worth using so you do not fall asleep mid-session and wake up an hour later.
If you are treating two areas at the same time using both channels, the 15 to 20 minute window covers both. You do not need to run separate sequential sessions for each muscle group unless you are targeting more than two areas. In that case, finish one 20-minute session, take a 5-minute break, then reposition the pads to the next priority areas and run a second session. Treating more than four areas in a single recovery window is probably overkill for most gym-goers and is more relevant for serious athletes doing twice-daily training.
What Else Helps Alongside TENS Therapy
TENS is a solid stand-alone tool, but it works best when it is part of a broader recovery approach. A few things that pair well: hydration and protein within two hours of training to give the muscle tissue what it needs to repair; light movement the morning after a hard session, even just a 10-minute walk, to get blood flowing without adding mechanical stress; and consistent sleep, which is where most actual muscle repair happens regardless of what recovery tools you use.
If your soreness is concentrated in a specific trigger point rather than a broad muscle belly, a lacrosse ball or foam roller used before your TENS session can help break up the knot so the electrical stimulation can reach the surrounding tissue more effectively. Think of the mechanical tools as creating the opening and the TENS unit as reinforcing the relief. They complement each other well, and neither replaces the other.
One thing TENS will not do: fix a true injury. If you feel sharp, localized pain during a lift, swelling around a joint, or numbness that runs down a limb, stop training and see a healthcare professional before using a TENS unit on that area. TENS is a recovery and pain-management tool for normal muscle soreness, not a substitute for medical evaluation when something is genuinely wrong.
Still waking up too sore to train the way you want? The TENS 7000 is the unit I put in front of most people first.
Rated 4.6 stars by more than 106,000 verified buyers. Dual-channel design, multiple modes, and a price point that makes it a realistic recovery tool for anyone who takes their training seriously. The pads, leads, and case are all included.
Amazon Check Today's Price on Amazon →