
If your hips feel stiff when you stand up from your desk, if your squat depth has been getting shallower, or if your lower back is picking up load that your hips should be handling, this is the guide for you. Tight hip flexors and restricted hip rotators are behind more aches, movement problems, and running inefficiencies than most people realize. The good news is that ten minutes a day with a set of Fit Simplify resistance bands can undo a lot of that stiffness, and you will feel it within the first week.
I built this protocol for the people I work with most: desk workers who train after hours, runners building their mileage, and lifters whose squats and deadlifts have started to feel jammed. You do not need a gym, a foam roller, or a physical therapist's office for this. You need a set of loop bands and about ten minutes. If you have an injury, a recent surgery, or pain that does not respond to gentle movement, please check with your doctor or a qualified physical therapist before starting any mobility protocol. With that said, let's get into it.
The band set I use for every move in this protocol
Fit Simplify resistance loop bands come in five resistance levels, pack into a small carry bag, and hold up to daily use without rolling or snapping. They are the most affordable way to add effective hip mobility work to your routine.
Amazon Check Today's Price on Amazon →Why Resistance Bands Work for Hip Mobility
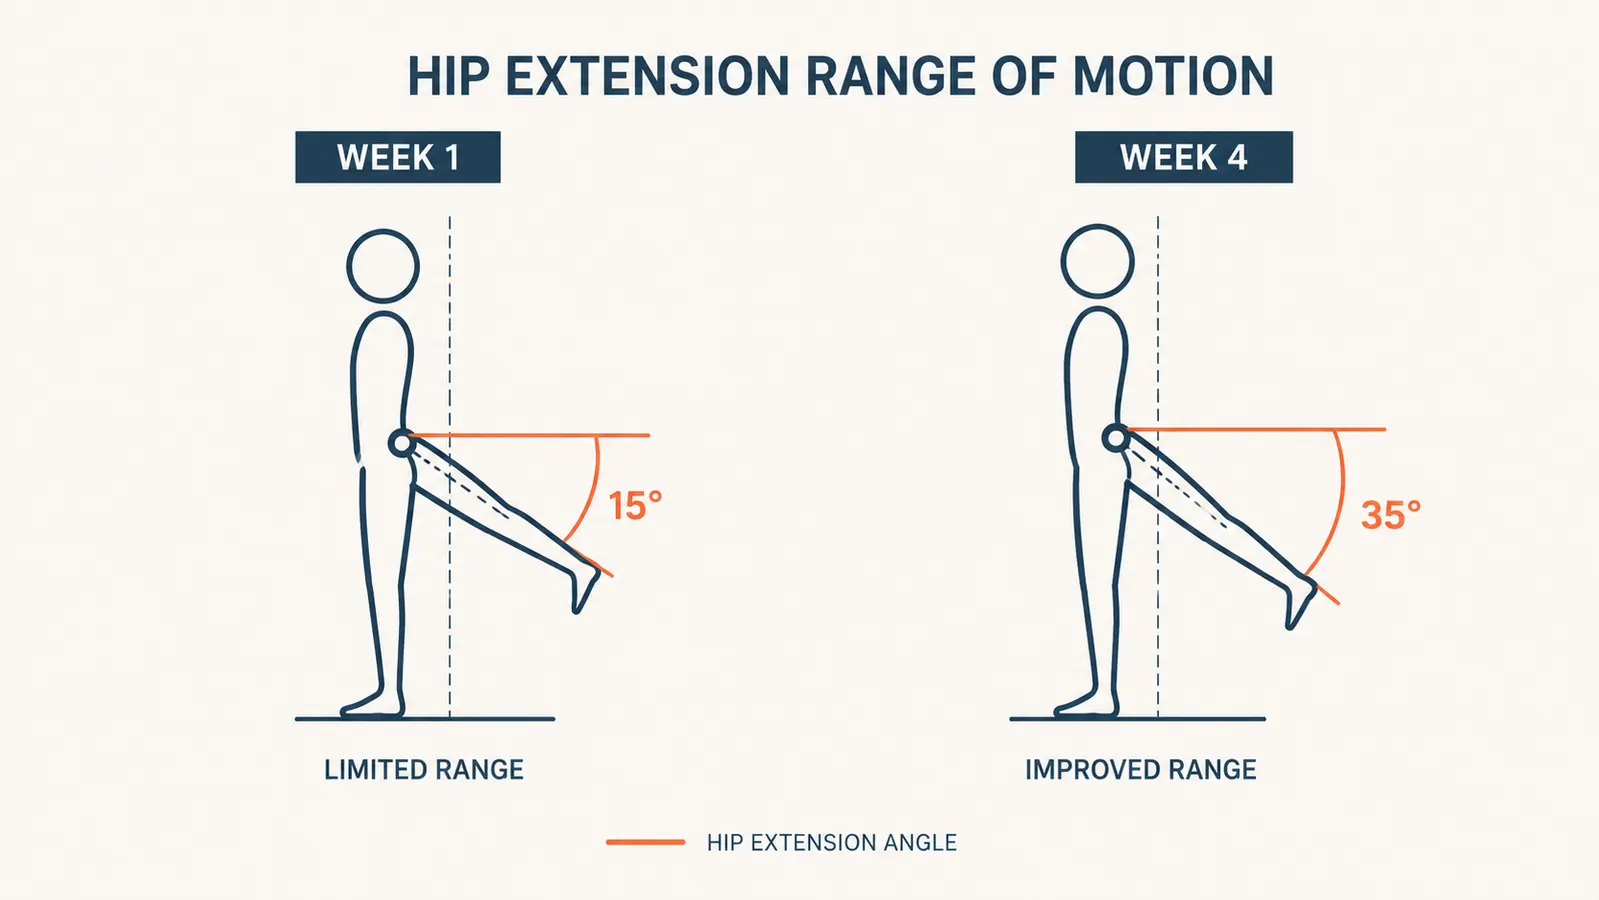
Stretching by itself opens a muscle temporarily. Resistance bands add a load component that teaches the hip to move through its range while under tension. That combination builds what coaches call usable mobility, range of motion your body will actually access during a squat, a stride, or a lateral cut. Passive flexibility fades. Loaded mobility sticks.
Bands also allow you to control the intensity precisely. A lighter band adds just enough resistance to feel the target muscle working without pulling you into pain. As your range increases over weeks, you move to a heavier band and keep the stimulus appropriate. That progressive loading is exactly what makes a tool like the Fit Simplify set so practical. You start on the yellow or red band, work up to blue or black, and the protocol stays effective the whole time.
The protocol below targets five areas: hip flexors, hip rotators, glute activation through abduction, adductor length, and hip extension under load. Hit all five in sequence, keep rest short, and the whole thing runs about ten minutes. Do it every morning or as a warm-up before your training session. Either works.
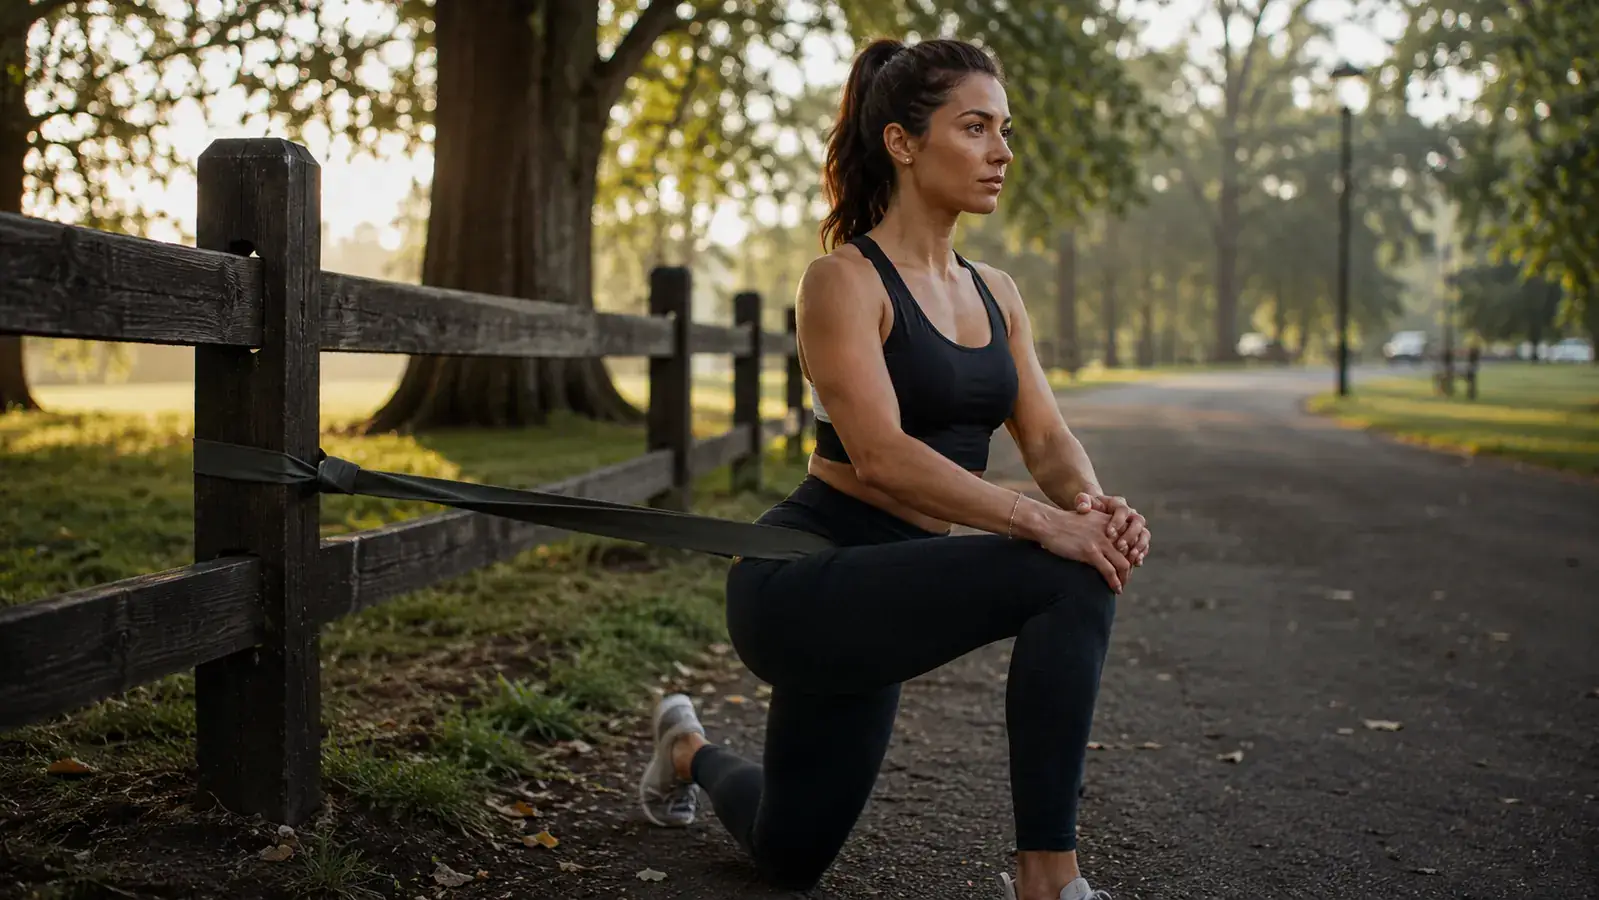
Step 1: Banded Hip Flexor Stretch with Posterior Pelvic Tilt
Start in a half-kneeling position on a yoga mat or carpet. Back knee down, front foot flat. Loop a light resistance band around your back ankle and anchor the other end under your front foot, or hold it in your opposite hand pulling gently forward. The point is a mild pull that encourages your hip to extend further than it would on its own.
The key detail most people skip: squeeze your back glute and tuck your pelvis slightly under before you shift forward. Without that posterior tilt, you are just compressing your lumbar spine instead of opening the hip. Shift your weight forward until you feel a clear stretch in the front of your back hip. Hold for three seconds, return, and repeat. Do twelve slow reps on each side. This is the single most effective move for desk-bound hip flexors, and it should take about ninety seconds per side.
If you feel this in your lower back rather than the front of your hip, back off the depth and focus harder on that glute squeeze. The hip should move, not the spine.

Step 2: Banded Clamshell for Hip External Rotation
Lie on your side with your hips stacked, knees bent to about forty-five degrees, and a light loop band placed just above both knees. Keep your feet together. Keeping your bottom hip on the ground, rotate your top knee upward as far as you can without your pelvis rolling back. Hold one second at the top, then lower slowly.
This move directly targets the hip external rotators and the glute medius, which are almost always underactive in people with tight hips. Weak external rotators force the femur to track inward, which puts strain on the knee and limits hip extension. Fifteen reps per side, no rushing. If you are shaking on the last few reps, that is the right level of band resistance.
After a week or two, most people find they need to move up one band level to keep the last few reps challenging. Track that progression. It is a clear sign the hip rotators are getting stronger.
Step 3: Standing Banded Hip Abduction
Stand with a medium resistance band looped around your ankles. Hold a wall or a doorframe for balance. Keeping your standing leg slightly soft at the knee, lift your working leg directly out to the side to about forty-five degrees. Do not hike your hip up to get there. The movement should feel like the side of your hip is doing the work, not your lower back or waist.
Lower slowly, three counts down. Fifteen reps per side. This move reinforces the glute medius strength that the clamshell started, but now you are doing it standing, which is closer to how your hips actually function during walking, running, and lateral movement. Runners especially benefit from this one because every stride requires your standing hip to stabilize against your body weight while the other leg cycles forward.
Hip mobility is not just about flexibility. It is about teaching your hips to move confidently under load. Bands add that load. That is what makes the difference between a stretch that wears off in an hour and a change that actually carries over into your training.
Step 4: Supine Banded Hip 90-90 Stretch
Lie on your back. Loop a medium band around your right foot, holding the ends in both hands. Bring your right knee up to ninety degrees, then let it fall slowly to the outside until your shin is parallel to the floor and your knee is out to the side at roughly ninety degrees. This is the 90-90 shape. Hold the band to keep a steady, gentle pull on the leg, which helps the adductors and internal rotators relax and let you sink deeper.
Breathe out as you sink into the stretch. Hold for four to five slow breaths at the bottom, then switch legs. This position targets the adductors and internal rotators, the muscles that most lifters and runners completely ignore until their groin or hip starts complaining. Two sets per side, holding for five breaths each. If your back is arching off the mat or your pelvis is rolling, you are pushing too far. Ease back until your lower back stays flat.
The 90-90 position is also a useful diagnostic. If one side is dramatically tighter than the other, that asymmetry is worth noting. A large difference between sides can contribute to SI joint irritation or uneven loading during squats and runs. If the difference persists after two or three weeks of consistent work, a physical therapist can help you address the underlying cause.
Step 5: Banded Hip Extension Kickback
Come to a hands-and-knees position on your mat. Loop a medium or heavy band around one ankle and anchor the other end under the opposite knee or around a sturdy table leg. Drive your banded heel straight back and slightly upward, squeezing your glute at the top. The goal is full hip extension, getting the working thigh parallel with the floor or just past it.
Keep your lower back neutral throughout. A lot of people compensate for a restricted hip by arching their lumbar spine. To guard against that, brace your core before each rep and only extend as far as you can while keeping your back still. Fifteen reps per side. Take a one-second pause at the peak of each rep. The glute should be firing hard. If it is not, you are probably using too light a band or letting your back carry the movement.
Hip extension is where all the previous work pays off. The flexor stretch from Step 1 gives you the range. The rotator work from Steps 2 and 3 stabilizes the joint. Steps 4 and 5 build the active strength to use that range when it matters: at the top of a squat, the drive phase of a run, or the lockout of a deadlift.
What Else Helps
This protocol addresses the muscle tissue, but hip mobility also has a soft-tissue component. If you are very tight, adding five minutes of foam rolling to your glutes and TFL before you start the band work will help. A lacrosse ball on the piriformis and the upper outer glute can release adhesions that limit how far the external rotators will let you rotate. Think of the rolling as prep work and the banded exercises as the actual training stimulus.
Sleep and hydration matter more than most people expect for joint mobility. Connective tissue is largely water. If you are chronically dehydrated, your joints will feel stiffer than they should. Same goes for sleep. Fascia and connective tissue do most of their repair work overnight. If your hips feel worst in the morning, that often signals a recovery issue rather than a flexibility issue.
Finally, do not skip this routine on days when you are stiff. Those are exactly the days it will help most. The protocol is short enough that there is no excuse to skip it. Put the bands somewhere visible, near your shoes or next to your coffee maker, and do the five steps before you sit down at your desk or head to the gym. Two weeks of consistency will show you more progress than six weeks of occasional effort.
If you want more band-based recovery work beyond the hips, the article on 10 resistance band stretches for post-workout recovery covers the full body cooldown routine I use with clients after training. And if you want a deeper look at the band set behind this whole protocol, read my full Fit Simplify resistance bands review where I share a year of daily use results.
Ready to start the protocol? These are the bands I recommend.
Fit Simplify loop bands are the most practical entry point for daily hip mobility work. Five resistance levels, durable latex, carry bag included. Check today's price and see if they are right for your training.
Amazon Check Today's Price on Amazon →